After an X-ray examination, you may need a digital version of it, for example, in order to send the image for a consultation with a doctor in another city. In addition, storing data electronically is convenient for many clinics, and patients, having a copy of their medical documents on their computer, no longer have to worry about accidentally losing them.
This article will tell you what methods exist for digitizing X-ray images, and which one to choose is up to the reader to decide.
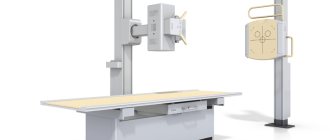
Automatic Dental Film Scanner
A little history
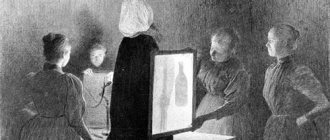
X-ray radiation was discovered in 1895 by the outstanding German physicist Wilhelm Kondrad Roentgen, who later became the first Nobel Prize laureate in physics.
It was he who received the first x-ray - it was his wife’s hand with a wedding ring. A new type of radiation was named in honor of the scientist. The prototype of the X-ray tube, which is now used in all modern X-ray machines, was invented by the American physicist William Coolidge. How it works: Ultrasound
Ultrasound is used to examine the heart, blood vessels, digestive system and pelvic organs. Find out how ultrasound works.
Document preparation
Step 1
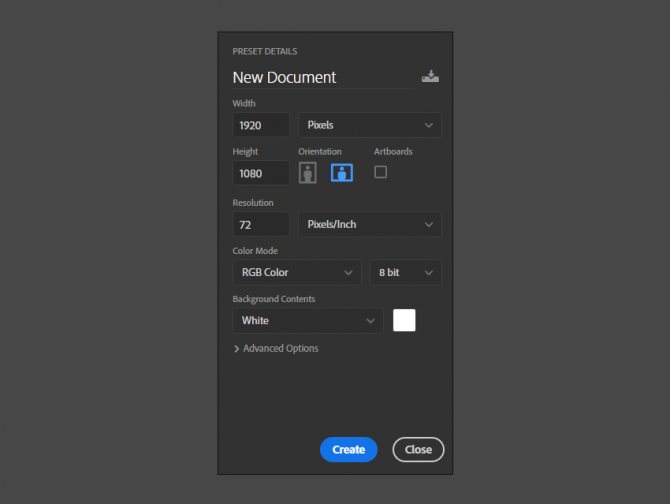
Let's start by creating a new document. To do this, go to the menu File – New (File – New) or use the combination Ctrl + N. For this tutorial we will use the following settings:
- Width : 1920 px
- Height : 1080 px
- Resolution : 72
- Color Mode : RGB
Step 2
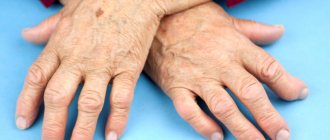
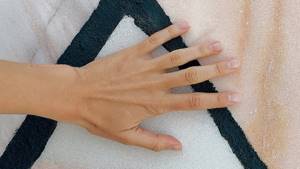
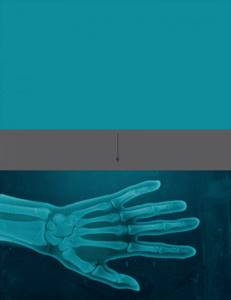
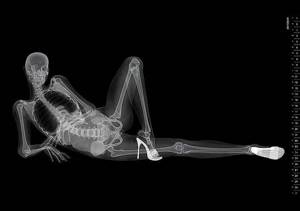
To work, we will need two pictures: the first is the actual object on which we will create the effect, and the second is the bones for this object. In our case, we will take a photo of the arm and hand bones.
Step 3
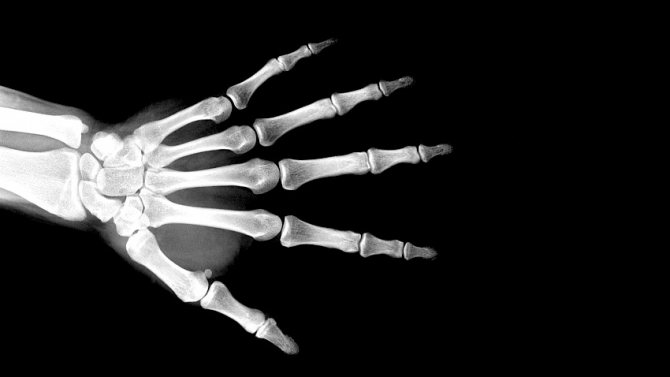
Below you can see the second photo. Having finished preparing the sources, we can move on to the next stage and begin working directly with the effect.
Step 4
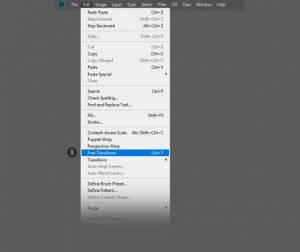
We transfer both images to the created document and use free transformation (Ctrl+T) to adjust their size. Both the hand and the bones should be approximately the same size.
How is the photo taken?
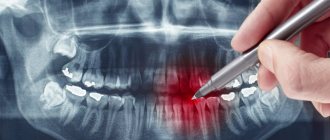
The principle of obtaining images using X-rays is based on the characteristics of their absorption by various tissues of the body. X-rays emitted by the tube pass through the human body and are projected on a special film - almost like in a camera. Calcium, contained in the bones of the skeleton, absorbs the most x-rays. Therefore, in the image obtained during the study, the bones will be the brightest - white, since the least amount of rays will hit the film in this area. Fat, body fluids, muscle and connective tissue absorb less rays and appear in shades of gray in the image. Air absorbs the least amount of X-rays. This is why cavities filled with it, such as the lungs, appear the darkest in photographs.
Customizing colors
Step 1
You can create a new action to customize the colors. This will be the second action in this tutorial and should be used after you have deformed the bones.
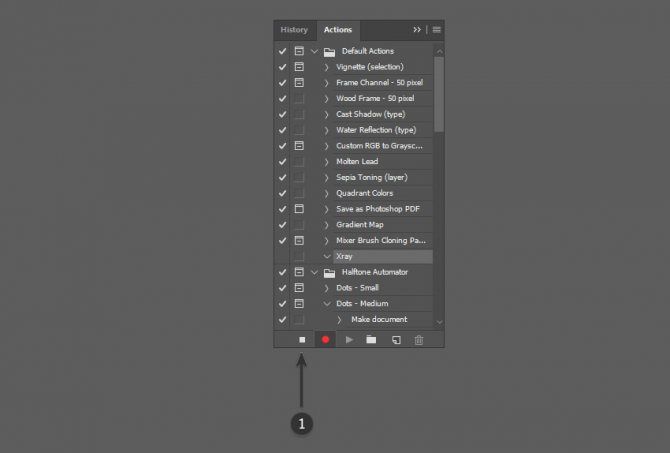
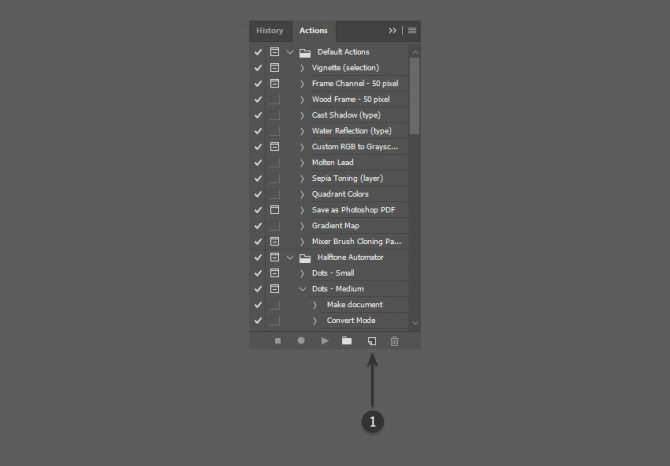
Go to the Window – Actions . At the bottom, click on the Create new action .
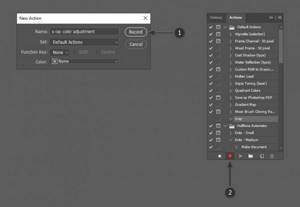
In the window that opens, write a suitable name, for example, “xray color correction.”
Step 2
Having finished with the preparation, click on the Record to start recording the action.
Step 3
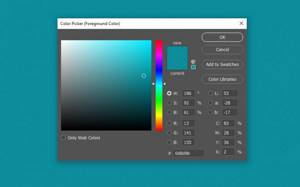
Create a new layer and use the Paint Bucket Tool
(G) (Fill) fill it with turquoise color (#0d8d9b).
Step 4
Place this layer above all previous ones and switch its blending mode to Overlay .
Step 5
At the bottom of the layers panel, click on the Create new fill or adjustment layer and select Curves .
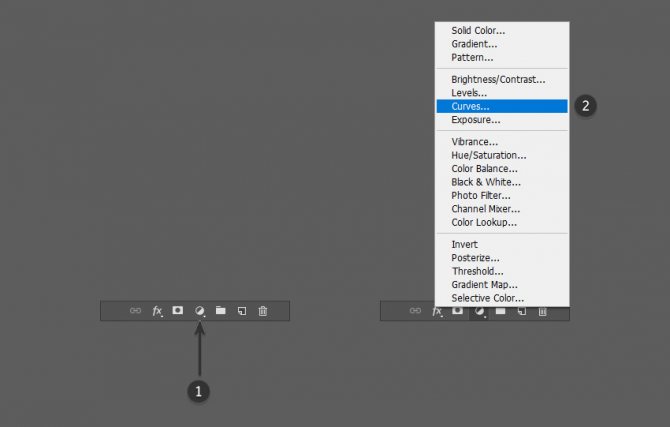
Step 6
In the Properties , select the Green . Left-click in the center of the curve and drag it down along the Y axis.

Step 7
After that, select the Blue . Create a point in the center of the curve. Then we add a second point at the bottom left and move it a little higher on the Y axis, as shown below.

Step 8
Select the RGB channel from the drop-down menu. About 1/3 of the white curve we place the first point and move it a little lower along the Y axis. Then we create a second point 2/3 of the curve and drag it up the Y axis. Look at my graph below to understand what it should look like curves.
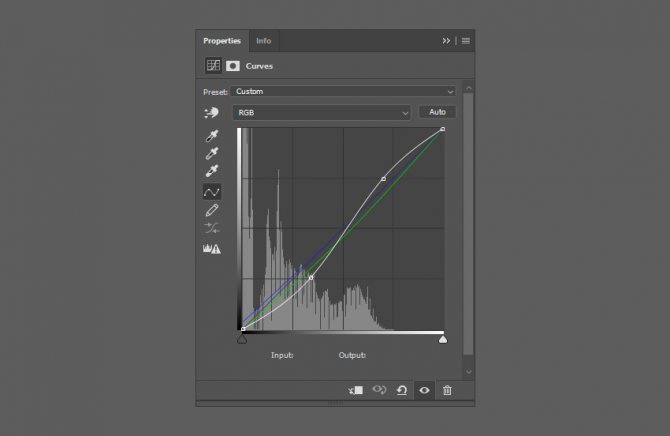
Step 9
Make sure the adjustment layer is above all previous layers. After using it, the picture will become brighter and more contrasting.
What happens during an X-ray examination?
Before the X-ray examination, you will be asked to remove clothing and all jewelry: these items will distort the resulting image. Depending on which area of the body will be examined, you will have to take a certain position. Not all of them may be comfortable - but the quality of the image depends on your stillness. The photo itself is taken within a second. Exposure to X-rays is absolutely painless
. If necessary, several different photographs of one area of the body are also taken - in different projections. The resulting images are then interpreted by a doctor.
Classification of digitizers
It is customary to consider several main classes of digitizers:
- Class DS.
When scanning film, image quality does not deteriorate. These digitizers are recommended to be used for digital archiving of images if their permanent storage is necessary in the future. - Class DB
. Slight degradation in quality is acceptable when scanning. Such systems are usually used for image analysis. - Class DA
. When scanning, there is a noticeable decrease in image quality and resolution. Such systems are used for analysis.
Digitizer AGFA CR 30-Xm
Price on request
Order CP
More details
Digitizer Konica Regius 110
Price on request
Order CP
More details
Digitizer Konica Regius 110 HQ
Price on request
Order CP
More details
Let's take a closer look at the technical characteristics and features of each class.
Possible risks
Modern X-ray machines use very low levels of X-ray radiation. Experts say that the radiation dose during the examination is comparable to that received by a passenger on a regular airliner during a flight. This means that the diagnostic advantages of the method significantly outweigh the damage that radiation manages to cause to the body's cells. Important!
X-ray examination is contraindicated in young children and pregnant women. It is prescribed only if this diagnostic method is vital.
Is it possible to do x-rays for pregnant women?
I will not expand on the topic that it would be better to prepare for pregnancy in advance, including “preparing” your own teeth at the dentist in advance. Yes, so as not to run away later with acute pain and be killed by doubts whether this or that manipulation will harm the developing baby... Therefore, let’s leave the lyrics and look at the bare facts and common sense. Without phobias, prejudices, speculations and myths. So, is it possible to do x-rays for pregnant women? Here's what they write to us about this in the documents (SanPiN 2.6.1.1192-03):
7.16. Pregnant women are prescribed for X-ray examination only according to clinical indications. Studies should, if possible, be carried out in the second half of pregnancy, with the exception of cases when the issue of termination of pregnancy or the need for emergency or emergency care must be decided. If pregnancy is suspected, the question of the admissibility and necessity of an x-ray examination is decided based on the assumption that there is a pregnancy...
7.18. X-ray examinations of pregnant women are carried out using all possible means and methods of protection so that the dose received by the fetus does not exceed 1 millisievert for two months of undetected pregnancy. If the fetus receives a dose exceeding 100 mSv, the doctor is obliged to warn the patient about the possible consequences and recommend terminating the pregnancy.”
In general, the conclusion from these two main points is simple and clear. In the first half of pregnancy, it’s definitely not worth taking pictures, but in the second half - 1 mSv for a visiograph - this is practically unlimited.
I would also like to add here that I have often encountered the militant obstinacy of this opinion: an x-ray at the dentist during pregnancy is an absolute evil. It’s better, they say, to screw up a tooth, to cure crooked canals... there are a lot of teeth, pregnancy is more important. Moreover, such sermons are given not only by lay patients who have little understanding of the essence of things, but also often by dentists themselves, who have forgotten their school physics course. To resolve this doubt, we must understand that sources of ionizing radiation are not only found in medical offices. And you don’t have to live next to Chernobyl (and now Fukushima) to receive some doses from the environment around us every day. After all, every second we are affected by both natural sources (sun, water, earth) and man-made ones. And the doses received from them are much greater than those received from an x-ray of a tooth. For clarity, we can give one simple example. As you know from a school physics course, the sun emits electromagnetic energy in a wide range, not only in infrared (heat), visible (light), ultraviolet (tan), but also in x-rays and gamma radiation. Moreover, the higher you are from the surface of the earth, the more rarefied the atmosphere is and, therefore, the weaker the protection from sufficiently strong radiation from the sun. And after all, while “fighting” radiation at the dentist, the same people often calmly fly south to bask in the sun and eat fresh fruit. Moreover, during a 2-3 hour flight “for a healthy” climate, a person receives 20-30 μSv, i.e. the equivalent of approximately 10-15 images on a visiograph. In addition, 1.5-2 hours in front of a cathode ray monitor or TV gives the same dose as 1 picture... How many pregnant women, sitting at home, watching TV series, hanging out on the Internet, think about how many pictures they “took” while watched another program, and then discussed it with friends on the forum and social networks? Almost no one, because the average person does not associate all this with ionizing radiation, unlike an image in a doctor’s office.
And yet, dear expectant mothers, prepare for pregnancy in advance. For many people, visiting the dentist still remains stressful. And it’s not so much that anesthesia or x-rays can be harmful during this period, but what is important is your peace of mind and the absence of unnecessary worries (of which many already have more than enough during this period).
Adjusting brightness and contrast
Step 1
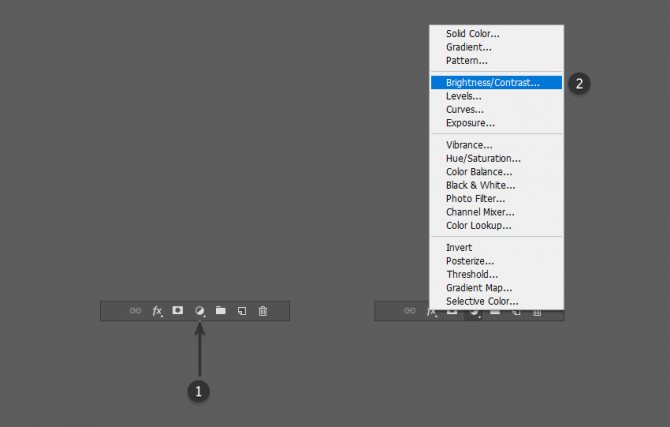
Again, click on the Create new fill or adjustment layer at the bottom of the layers panel and select Brightness / Contrast .
Step 2
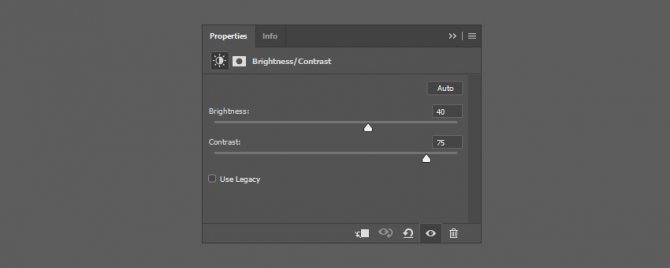
In the Properties , set up the adjustment layer:
- Brightness : 40
- Contrast : 75
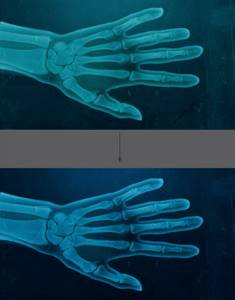
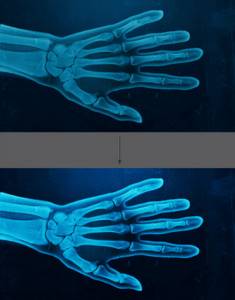
Step 3
Make sure both adjustment layers are at the very top of the layers panel. As a result, the effect should become even brighter.
Step 4
Now you can leave the action and save it. Click on the Stop at the bottom of the action panel. The action was automatically saved and you can find it in the Actions panel next to the first action.