- Beginning of section
- Test tubes Test tubes for blood collection
- Test tubes with reagents
- Centrifuge tubes
- Microtubes with snap lock
- Tripods for monovet
- Accessories for blood collection
Materials provided by SarstedtAG & Co., translation into Russian 2015.
Author of the material: Professor, Doctor of Natural Sciences Ralf Lichtinghagen (Prof. Dr. Ralf Lichtinghagen), Germany 2014
When using this material, you must cite the author and copyright holder.
1.1. Standard blood sampling conditions
— 3 days before blood collection, the patient should avoid excessive and extreme physical activity.
— On the eve of blood collection, the patient should refrain from drinking alcohol (24-hour abstinence from alcohol).
— Between 7 and 9 a.m., blood sampling should be done on an empty stomach (i.e., abstaining from eating for 12 to 14 hours, drinking water is allowed).
— The patient must be at rest (sitting or lying down) for 10 minutes before taking blood.
— While drawing blood, using your fist is unacceptable! Clenching and unclenching a fist leads to a significant increase in calcium levels (up to 2 mm/l) in serum/plasma.
— The tourniquet should be applied for no more than 1 minute (preferably no more than 30 seconds).
— The sequence of actions should be followed: puncture the vessel, loosen the tourniquet, take a blood sample.
— The prescription or withdrawal of medications to a patient is made in agreement with the doctor.
| Reagents | Application area | |
| Serum | Clinical chemistry, serology, special studies | |
| Serum gel | Clinical chemistry, serology, special studies | |
| Lithium heparin | Obtaining plasma for clinical chemistry, serology | |
| EDTA K | Hematology (eg hemoglobin, hematocrit, red blood cells, white blood cells) | |
| Citrate 1:10 | Coagulation tests (eg, Quick test, partial thromboplastin time, platelet link, fibrinogen) | |
| Citrate 1:5 | Determination of erythrocyte sedimentation rate using the Westergren method or using the S-Sedivette system | |
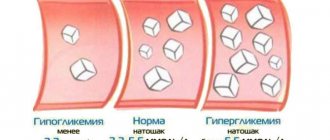
| Fluoride | Determination of glucose levels (stability over 24 hours), as well as enzyme lactate | |
| GlucoEXACT | Determination of glucose levels (stable for 48 hours, at room temperature) | |
General conditions for storing biosamples before delivery to the laboratory
| Type of product used to collect and deliver the biospecimen | Temperature conditions, etc. | Delivery to the laboratory |
| Bioassays in vitro with transport media | at room temperature (18-20°C), in a dark place | within 48 hours |
| Sterile container with native biomaterial | at room temperature (18-20°C), in a dark place | within 2 hours |
| at a temperature of 2-80C | in 24 hours | |
| at a temperature of 370C | within 2 hours* | |
| Blood vials for sterility | at room temperature (18-20°C), in a dark place | within 2 hours |
| in 24 hours** |
* Delivery of cerebrospinal fluid for bacteriological research.
** Delayed loading of vials into the analyzer increases analysis time.
table 2
1.2. Standard blood sampling conditions
— 3 days before blood collection, the patient should avoid excessive and extreme physical activity.
— On the eve of blood collection, the patient should refrain from drinking alcohol (24-hour abstinence from alcohol).
— Between 7 and 9 a.m., blood sampling should be done on an empty stomach (i.e., abstaining from eating for 12 to 14 hours, drinking water is allowed).
— The patient must be at rest (sitting or lying down) for 10 minutes before taking blood.
— While drawing blood, using your fist is unacceptable! Clenching and unclenching a fist leads to a significant increase in calcium levels (up to 2 mm/l) in serum/plasma.
— The tourniquet should be applied for no more than 1 minute (preferably no more than 30 seconds).
— The sequence of actions should be followed: puncture the vessel, loosen the tourniquet, take a blood sample.
— The prescription or withdrawal of medications to a patient is made in agreement with the doctor.
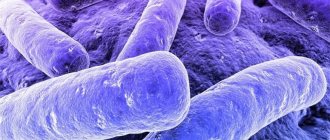
How to submit material for bacteriological examination Bacteriological laboratory - for patients: how to submit material for bacteriological examination
General requirements for the collection and transportation of samples of biological material for bacteriological research:
- Samples must be collected before the start of antibacterial therapy, if this is not possible, just before re-administration of the drug.
- Samples must be collected with minimal contamination of the material by normal microflora, because its presence leads to an erroneous interpretation of the result
- Samples must be collected in sterile disposable containers intended for bacteriological research. Do not wash the sterile container before use!
- When collecting and transporting samples, do not contaminate the outer surface of the container and accompanying documents (directions)
- Collected samples are delivered to the laboratory no later than 2 hours from the moment of collection, in the case of using a transport system (sterile tube with transport medium and a swab sterilely packaged with the tube) - within 48-72 hours.
ATTENTION!
Failure to follow the rules may lead to the need to retake the test or incorrect interpretation of the result.
Vessels used for transporting samples to the bacteriological laboratory
Referral to the bacteriological laboratory of City Clinical Hospital No. 15 named after. O.M. Filatov for bacteriological examination (bacterial culture) Copy of insurance policy
Vessels used for transporting samples to the bacteriological laboratory
| Type of study | Dishes |
| The patient collects the material independently | |
| bacteriological examination of urine to determine the degree of bacteriuria | sterile disposable container |
| bacteriological examination of stool for pathogenic intestinal flora | sterile disposable container with a spoon built into the lid |
| bacteriological examination of stool for dysbacteriosis | sterile disposable container with a spoon built into the lid |
| bacteriological examination of sputum | sterile disposable container |
| bacteriological examination of breast milk | sterile disposable container |
| qualitative determination of Helicobacter pylori antigen in human feces | Sterile disposable container with a spoon built into the lid |
| qualitative determination of Clostridium difficile toxin A and B antigens in human feces | sterile disposable container with a spoon built into the lid |
| The material is collected by a specialist at a medical facility | |
| bacteriological examination of discharge from various foci of inflammation: otitis, sinusitis, wound discharge, etc. | sterile tube with transport medium and swab, sterilely packaged with the tube |
| bacteriological examination of punctates, effusions, exudates | sterile disposable container, sterile tube with transport medium and swab, sterilely packaged with the tube |
| bacteriological examination of the mucous membrane of the pharynx and nose for opportunistic microflora | sterile tube with transport medium and swab, sterilely packaged with the tube |
| Bacteriological examination of the mucous membrane of the throat and nose for Staphylococcus aureus (S.aureus) | sterile tube with transport medium and swab, sterilely packaged with the tube |
| bacteriological examination of genital secretions for opportunistic microflora | sterile tube with transport medium and swab, sterilely packaged with the tube |
| bacteriological examination of conjunctival discharge | sterile tube with transport medium and swab, sterilely packaged with the tube |
Rules for the collection of biological materials collected by patients themselves
URINE
- Before collecting the sample, thoroughly wash the external genitalia and anal area with warm water and soap.
- The use of disinfectants for processing is not allowed.
- It is not allowed to collect urine from bed linen, a urine bag or a bedpan.
- For analysis, an average portion of morning urine should be collected. Start urinating into the toilet, collect the middle portion in a sterile disposable container in the amount of 10-20 ml, and finish urinating into the toilet.
- The sample must be delivered to the laboratory no later than 2 hours from the moment of collection.
FECES
- Feces for examination should be collected in the morning.
- Defecation is carried out in a dry, clean, pre-disinfected container. It is important to thoroughly remove disinfectants from the surface of the container, rinse with boiling water and cool to room temperature.
- Transfer a stool sample of 3-4 spoons (1.5-2.0 g) into a sterile disposable container using a sterile spatula mounted in its lid. If there are pathological impurities in the stool - pus, mucus, blood, flakes - they must be included in the sample taken. — If the feces are liquid, fill the container to no more than 1/3 of the volume.
- In intensive care patients and small children, it is allowed to collect material from a sterile dry diaper without touching the fabric.
- Do not allow urine or water to enter the stool sample.
- The sample is delivered to the laboratory no later than 2 hours from the moment of collection. In case of extreme necessity (it is impossible to obtain a morning sample), it is permissible to leave the material obtained the day before during an evening bowel movement in the refrigerator and deliver it to the laboratory in the morning.
- Attention! When ordering a stool test to determine the Clostridium difficile toxin antigen, only loose stools are subject to examination.
SPUTUM
- Before collecting sputum, the patient should brush his teeth and rinse his mouth and throat with warm boiled water.
- It is important that the contents of the nasopharynx or saliva do not get into the container.
- A sputum sample obtained from a deep cough is collected in a sterile, disposable container with a screw cap.
- The sample is delivered to the laboratory no later than 2 hours from the moment of collection.
BREAST MILK
- When expressing milk, a woman washes her hands with soap and carefully cleans the nipples and parapapillary area with separate cotton swabs moistened with 700 alcohol.
- Milk from the right and left mammary glands is examined separately.
- The first 5-10 ml of milk is poured out, the next 3-4 ml is expressed into a sterile disposable container.
- Samples are delivered to the laboratory no more than 3 hours before the test.
- Milk expressed the day before is not subject to examination.
Sterile disposable containers for bacteriological research can be purchased independently from pharmacies.
In the bacteriological laboratory, bacteriological examination of other biological materials is carried out, which are collected by a specialist in medical institutions.
Time for receiving biological material for bacteriological examination:
Monday-Friday 8.30-10.00 Tel.
Main building of the hospital, central entrance, to the right of the information desk
When submitting material for research, you must have the following documents with you:
- Referral to the bacteriological laboratory of City Clinical Hospital No. 15 named after. O.M.Filatova for bacteriological examination (bacterial culture)
- Copy of insurance policy
1.3. Obtaining test material: 12 steps
| 1. Disinfect your hands! Wear gloves! | 7. Turn the needle with the bevel in the direction opposite to the surface of the skin! |
| 2. Apply a venous tourniquet. | 8. The puncture angle should be less than 30 degrees. |
| 3. Assess the condition of the veins and make a choice. | 9. Secure the vein by tautening the skin! |
| 4. Disinfect the puncture site! | 10. If possible, warn the patient about the start of the procedure. |
| 5. Do not touch the puncture site anymore! | 11. As soon as blood begins to flow into the test tube, loosen the tourniquet! |
| 6. Remove the protective cap from the needle! | 12. Take samples, follow the sequence of actions! |
1.4. Application of a tourniquet and choice of puncture site
Disinfect the puncture site according to current hygiene procedures
Apply a tourniquet palm-width above the puncture site
The pulse should be palpable (tourniquet pressure 50-100 mm Hg) Maximum duration of tourniquet application is 1 minute
Comparison of results when increasing the tourniquet application time from 2 to 6 minutes
Puncture sites
- Vena basilica
- Vena mediana cubiti (this refers to a deeper vein that is not visible in blue and is only visible as a bulge)
- Vena cephalica (passes from the side of the thumb)
- Vena cephalica
- Vena basilica
- Rete venosum dorsale manus
Tourniquet application time
Application of a tourniquet for more than 1 minute may cause changes in the concentration of substances and measurement results.
For high-molecular substances (for example, total protein), as well as for protein-bound calcium, distortedly high measurement results can be obtained (especially for measured values with relatively narrow reference intervals).
Potassium levels may decrease with increasing tourniquet application time.
1.5. Problems before and during blood collection
Poor vein condition
- Choose another puncture site.
— Apply a thermal wipe or warm cloth.
— Use the safe Multifly kit.
- Use the aspiration method to collect blood.
“Fist work”, which causes an increase in blood flow, due to muscle activity leads to an increase in K and Mg levels.
— Excessively prolonged compression of the vein leads to changes in a number of parameters, for example, K, GGT.
— “Bending” of the safety needle is not required when using the S-Monovette, since the standard puncture is performed at a very small angle. Changes in the lumen as a result of needle bending can lead to cell damage (hemolysis).
- A needle that is too thin can also cause hemolysis.
The bevel of the needle is adjacent to the wall of the vein
Solution: Retract the needle slightly until blood flow is restored.
The needle pierced a vein
Solution: Draw the vein back slightly until blood flow is restored.
The walls of the vein collapsed
Solution: Wait until the vein returns to its original state, and then carefully draw blood.
1.6. Suction technology and vacuum technology
1.6.1. S-Monovette – suction technology
Attention! — Just before puncture of the vein, you should fix the S-Monovette needle by turning it slightly clockwise.
- Using the thumb of your free hand, stretch the skin and fix the vein. Warn the patient to begin the procedure and insert the needle into the vein. As soon as the vein is punctured, the first drop of blood will enter the S-Monovette, indicating that it has entered the vein.
— Loosen the tourniquet and slowly pull back the piston. Wait until blood stops flowing into the tube.
— When taking multiple samples, remove the first S-Monovette tube from the needle by turning it slightly counterclockwise. In this case, the needle remains in the vein.
After drawing blood
— First disconnect the S-Monovette and then remove the needle from the vein.
Attention! After completing the blood collection procedure (this applies to all S-Monovette devices), pull the piston rod until it clicks and break off the handle.
1.6.2. S-Monovette – vacuum technology
— Before drawing blood, the safety needle must already be in the vein.
— We strongly recommend using the first S-Monovette tube using the aspiration technique so that blood collection can begin in a gentle manner. Then you can move on to vacuum technology.
— Immediately before drawing blood, pull the piston to the bottom of the S-Monovette tube until you hear a characteristic click. Break off the handle (a crunching sound is heard).
— Connect the S-Monovette tube with the created vacuum to the needle and fix it by rotating it clockwise.
— Wait until blood stops flowing into the tube, then disconnect the S-Monovette from the safety needle, then remove the safety needle from the vein.
Aspiration technique
Vacuum technology
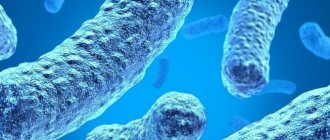
Technique for collecting and culturing blood for blood culture and sterility
Purpose: to determine the type of pathogenic gel of an infectious disease and its sensitivity to antibiotics.
Equipment: Syringe for single use, sterile tray with swabs and tweezers, rubber tourniquet, napkin (place under the tourniquet), 70% ethyl alcohol, overalls (sterile gown, mask, gloves), clean test tubes in a rack.
Additional equipment: - sterile bottles with media (in the 1st week of the disease, receive a bottle with 100 ml; in the 2nd week, 150 ml; 3rd week - 200 ml) obtained in the bacteriological laboratory at the time of blood sampling;
- matches, alcohol lamp.
| Stages | Note |
| Preparation for the procedure | |
| 1. Explain to the patient the purpose and course of the study and obtain his consent. If necessary, provide instructions and draw up instructions for preparing the patient for the procedure. | Blood sampling is carried out in the evening at the height of the temperature curve. It is recommended to avoid eating fatty foods on the eve of the test. |
| 2. Prepare equipment, number the test tube and direction. | Each patient's tube and referral have the same number. |
| 3. Help the patient to find a comfortable position for venipuncture, lying or sitting. | Depends on the severity of the patient's condition. |
| 4. Wash and dry your hands, put on overalls and gloves. | The sister's safety in the workplace is maintained. |
| 5. Place an oilcloth roller under the patient’s elbow. | For maximum extension of the elbow joint. |
| 6. Apply a rubber tourniquet in the area of the middle third of the shoulder and tie it so that the loop of the tourniquet is directed downward and the free ends upward (place a napkin under the tourniquet or straighten the shirt sleeve). | |
| 7. Ask the patient to clench and unclench his fist several times. Find the most filled vein. | It is better to puncture the filled and fixed vein. |
| 8. Treat the vein in the elbow area with cotton balls or napkins moistened with 70% alcohol at least twice, changing them, observing the rules of asepsis. | Be sure to follow the rules of asepsis. |
| 9. Light the alcohol lamp. | |
| Executing the procedure | |
| 1. Draw the required amount of blood into the syringe, remove the needle, and dump it into a disinfectant solution. | 10 ml is drawn from a vein in the 1st week of the disease: in the 2nd week -1 5 ml; in the 3rd week - 20 ml. |
| 2. Open the sterile container with your left hand, maintaining sterility, burn the neck over the flame of an alcohol lamp. | |
| 3. Slowly release the blood from the syringe without touching the walls of the container. Close the container, burning the cork. | |
| End of the procedure | |
| 1. Help the patient stand or lie down comfortably. | Depends on the severity of the patient's condition. |
| 2. Place the tripod in the container, then in the box, sealing it with cotton wool or foam rubber. | |
| 3. Deliver a blood sample and a referral to a clinical laboratory. |
Technique for collecting blood for serological and biochemical studies
Purpose: laboratory diagnosis of infectious diseases.
Equipment: syringe for single use, sterile tray with cotton swabs and tweezers, rubber tourniquet, napkin (place under the tourniquet), 70% ethyl alcohol, overalls (medical gown, mask, gloves).
Clean test tubes in a rack.
| Stages | Note |
| Preparing for the procedure. | |
| 1. Explain to the patient the purpose and course of the study and obtain his consent. If necessary, provide instructions and draw up instructions for preparing the patient for the procedure. | Blood sampling from a vein is carried out in the morning, on an empty stomach, before taking medications. It is recommended not to eat fatty foods the day before the test. |
| 2. Prepare equipment, number the test tube and direction. | Each patient's tube and referral have the same serial number. |
| 3. Help the patient find a comfortable position, lying or sitting for venipuncture. | Depends on the severity of the patient's condition. |
| 4. Wash and dry your hands, put on overalls and gloves. | Medical safety is maintained. sisters at work. |
| 5. Place an oilcloth roller under the patient’s elbow. | For maximum extension of the elbow joint. |
| 6. Apply a rubber tourniquet in the area of the middle third of the shoulder and tie it so that the loop of the tourniquet is directed downward and the free ends upward (place a napkin under the tourniquet or straighten the shirt sleeve). | When tied, the tourniquet should not pinch the skin of the arm, and during venipuncture, its ends should not come into contact with the area treated with alcohol. |
| 7. Ask the patient to clench and unclench his fist several times. Find the most filled vein. | It is better to puncture the filled fixed vein. |
| 8. Treat the vein in the elbow area with cotton balls moistened with 70% ethyl alcohol at least twice, changing them and observing the rules of asepsis. | Be sure to follow the rules of asepsis. |
| Execution of the procedure. | |
| 1. Perform venipuncture. | |
| 2. Make sure that the needle is in the vein: pull the piston towards you. | There is a feeling of “falling into emptiness.” Blood should appear in the syringe. |
| 3. Continue to pull the piston towards you, drawing the required amount of blood without removing the tourniquet. | The amount of blood depends on the type and number of tests. |
| 4. Untie the tourniquet before removing the needle from the vein. | This will prevent the formation of a hematoma at the puncture site. |
| 5. Press the puncture site with a sterile cotton ball (napkin) moistened with 70% alcohol and remove the needle. Fix the ball for 1-2 minutes, then throw it into a disinfection container | Do not leave a cotton ball contaminated with blood on the patient. |
| 6. Ask the patient to bend his arm at the elbow while holding a cotton ball at the puncture site. | A cotton ball at the puncture site compresses the vein and helps stop bleeding after the injection. |
| 7. Remove the needle from the syringe and discard it into the disinfectant solution. | You don't have to do this, but you need to be aware that red blood cells can be damaged when blood is released from the syringe through the needle and this will cause them to hemolyze. |
| 8. Slowly release the blood along the wall of the test tube located in the rack. | Make sure that the blood does not foam when quickly filling the tube, as this will lead to hemolysis of the blood in the tube. |
| 9. Place the disassembled syringe into the injection container. | |
| End of the procedure. | |
| 1. Help the patient stand or lie down comfortably. | Depends on the severity of the patient's condition. |
| 2.Install the tripod into the container, then into the Bix. | A detailed home address is required for final disinfection of the outbreak. |
| 3. Deliver the blood pack and a referral to the immunological laboratory. |
Technique for performing and recording allergy skin testing
Purpose: to determine the increased sensitivity of the macroorganism to the pathogen and its toxins, for the diagnosis of brucellosis, tularemia, toxoplasmosis, typhoid fever, psittacosis, dysentery, Q fever, etc.
Equipment: tuberculin syringe with needle, 70% ethyl alcohol, allergen (brucellin, tularin).
| Stages | Note |
| Preparation for the procedure | |
| 1. Explain to the patient the meaning and necessity of the upcoming study, the timing of obtaining the result, and obtain consent for the procedure. | |
| 2. Wash your hands with soap, put on a robe, gloves, and a cap. | |
| Executing the procedure | |
| 1. Sit the patient down and treat the skin of the middle part of the palmar surface of the forearm. | 1. Sterility is maintained. |
| 2. The bevel of the needle, facing upward, is completely inserted into the skin. After which the administration of the drug begins. | 2. Compliance with the rules of administration of the drug. |
| 3. With proper intradermal administration, a small, whitish, clearly defined and dense bubble (“button”), which looks like a lemon peel, is formed at the injection site and disappears after 10-15 minutes. | 3. After introducing the allergen, warn the patient not to wet, lubricate, bandage, or heat the injection site. |
| 4. Evaluation of results 24–48 hours after allergen administration. | 4. Precisely indicate the date and time of arrival to control and record the reaction. The size of the infiltrate is taken into account, not the hyperemia. |
| Evaluation of results. Reactions are divided into: · sharply positive - increased body temperature, regional lymphadenitis, infiltrate diameter more than 6 cm. · - positive - no general reaction, infiltrate diameter 3-6 cm. · - weakly positive - infiltrate diameter 1-3 cm. · - doubtful - infiltrate diameter less than 1 cm. The reaction is considered negative if, after the introduction of the allergen, redness of the skin appears (without swelling), which usually disappears after 1-3 hours. |
1.7. Taking blood samples from catheters
Drawing blood from catheters should be avoided due to possible distortion of measurement data. Possible risks here are hemolysis and bacterial contamination due to infusions. In cases where drawing blood from a catheter is unavoidable, the following must be considered:
— To avoid dilution effects or bacterial contamination, at least 15 minutes should elapse between the last infusion and blood collection. The timing depends on the infusion and should be in accordance with the internal regulations of the hospital.
| Infusion | Minimum period of time (in hours) before blood is drawn after the end of the infusion |
| Fat emulsion | 8 |
| High carbohydrate solution | 1 |
| Amino acids, protein hydrolysates | 1 |
| Electrolytes | 1 |
— If the catheter was flushed with a heparin-containing solution, it should be flushed with a sodium chloride solution before drawing blood for clotting tests.
— Before taking a blood sample, 5-10 ml of blood should be poured into a separate tube and not used. To avoid confusion, this tube should be labeled accordingly.
In principle, difficulties in interpreting questionable test results can be simplified by informing the laboratory that the sample was taken from a catheter. To monitor drug treatment, special attention should be paid to the risk of bacterial contamination. The ingress of medication residues may lead to too large distortions in the measurement results.
Risk factor for hemolysis: catheters
When drawing blood from catheters, it is not recommended to use a vacuum technique due to the high speed of blood flow, which creates a high risk of hemolysis.
Using the suction technique, gentle, slow filling of the S-Monovette is possible. Thanks to this, the risk of hemolysis is significantly reduced.
Multi-Adapter: Direct Connection
The S-Monovette can be directly connected to a catheter using the Multi-Adapter.
The use of disposable syringes and thus the risk of hemolysis and bacterial cross-contamination can be prevented.
— To connect the S-Monovette to Luer adapters, use, for example, an in vitro catheter or a three-way stopcock.
Rules for collecting and inoculating blood for sterility and blood culture
Flush the stomach of a patient with PTI
At the first signs of food poisoning (nausea, vomiting, abdominal pain, tenesmus, diarrhea), the patient needs to rinse the stomach by asking him to drink a liquid or by introducing it into the stomach through a tube. The procedure can be repeated at a later date if nausea and vomiting continue. For this purpose, use a 2% solution of sodium bicarbonate, a weak solution of potassium permanganate or ordinary boiled water. Rinsing is carried out until the rinsing waters become clean, without lumps of undigested food and mucus. Frequent vomiting and loose stools lead to dehydration of the body, so the patient, depending on the severity of his condition, is prescribed rehydration treatment for food toxicoinfection in children using rehydron, quartasol, trisol orally. Infusion rehydration therapy is indicated in more severe cases, with toxicosis with exicosis, and in this case, a 5% glucose solution, saline solutions, and Ringer-Locke solution are prescribed. Detoxification therapy includes the prescription of hemodez, polyglucin, reopolyglucin, which improve blood circulation and relieve symptoms of intoxication. Antipyretic and anticonvulsants and glucocorticoids are also prescribed. In case of severe pain, antispasmodics are prescribed.
nutritional features of infectious patients
Basic rules for therapeutic nutrition of an infectious patient
The founder of Russian dietetics, M.I. Pevzner, developed diet No. 13 for infectious patients, and recommended following the following rules when preparing a diet for an infectious patient:
A febrile patient should not be allowed to go hungry. He should receive enough food, but in small portions at a time.
Any overfeeding is contraindicated, even if the patient has an appetite.
If possible, you should exclude from your diet foods that mechanically irritate the digestive organs.
It is necessary to monitor the function of the excretory organs and, in case of constipation, include in the diet foods that have a laxative effect (sugar, honey, juices of raw vegetables, fruits and berries), and in case of diarrhea, exclude pure milk, cold drinks and limit the amount of sugar.
In case of kidney symptoms, it is necessary to exclude strong broths, extractives, and spices from the diet.
It is necessary to take into account the state of the patient’s nervous system, allowing the introduction into the diet of only a small amount of nutrients that irritate the nervous system (strong coffee, tea, very strong broth), or even excluding them completely.
During acute infections, the body's need for vitamins increases significantly. Of particular value are vitamins that in one way or another affect the state of the immune system. The richest foods in vitamin C are rose hips, black currants, citrus fruits, and sea buckthorn. Food sources of vitamin A: liver, beluga caviar, egg yolk, butter, hard cheeses. Vitamin B2 (riboflavin) is found in large quantities in offal, yeast, almonds, cheeses, eggs, and cottage cheese. Vitamin B6 (pyridoxine) is found in offal, meat, beans, soybeans, rice, millet, and potatoes. D improves the state of anti-tuberculosis and antifungal immunity. Food sources of vitamin D: liver oil of fish and marine animals, salmon, herring, mackerel, caviar, tuna, egg, cream, sour cream.
Among the microelements, the most important for the state of the immune system is zinc, deficiency of which develops with enteritis, especially in patients who abuse alcohol. Food sources of zinc: shellfish, mushrooms, egg yolk, liver, meat. Legumes, sesame, and peanuts also contain a lot of zinc, but it is associated with phytic acid. The daily requirement for zinc is 15–25 mg.
Stages of diet therapy for infectious diseases
Against the background of a high fever, it is quite acceptable to only drink thirst-quenching drinks for 1-2 days; the patient should not be forced to eat. If fever continues for more than 5–7 days, enteral or parenteral nutrition should be prescribed.
When the patient's condition improves after a drop in body temperature, an increase in appetite is often noted. However, there is no need to strive to completely satisfy it from the very beginning, since in the first 3-4 days temperature fluctuations are observed for some time, and the production of gastrointestinal enzymes is disrupted. That is why you should not sharply expand your diet during these 3-4 days.
With further expansion of the diet, the greatest attention should be paid to replenishing protein and vitamin deficiencies. Either diet No. 11 or diet No. 15 is used. The amount of protein in the diet should be 1.5 g/kg of ideal body weight, while the quota of fats and carbohydrates corresponds to the norms of a balanced diet. Convalescents are prescribed a diet with a restriction of foods that stimulate the central nervous system (strong coffee, tea, strong broths, spices, chocolate) and foods containing coarse fiber and essential oils (rutabaga, turnip, garlic, radish, radish). Cakes, pastries, and shortcrust pastry products are not shown. All types of culinary processing are allowed: boiling, stewing, baking and frying without breading. The diet is 3-4 times a day.
Sometimes convalescents may experience dyspeptic symptoms due to a rapid expansion of the diet. In this case, it is necessary to appoint a fasting day (boiled vegetables without salt and oil, baked apples) and check whether the diet is composed correctly, whether the patient has taken into account the presence of concomitant chronic diseases of the digestive system, and, if necessary, make appropriate adjustments.
Blood collection for typhoid fever
Technique for collecting blood for culture
.
With strict adherence to sterility, draw 5-10 cm3 of blood from the cubital vein into a Record or Luer syringe, remove the needle with tweezers, burn the cannula of the syringe on an alcohol flame and then pour the blood into the flask with the medium; Burn the neck of the flask and the stopper before closing. Either broth or bile (50-100 cm3 of medium) is used as a nutrient medium. Technique for collecting blood for agglutination (Vidal reaction).
From the flesh of the finger, pump 1.5-2 cm3 of blood into a sterile Pasteur pipette and, when full, seal it or draw 3-5 cm3 of blood from the cubital vein with a syringe, which is then poured into a sterile test tube.
Store the collected blood in a cool place. If necessary, you can use filter paper; to do this, collect 2-3 falling drops of blood on a piece of paper measuring 5x10 cm, dry it in air, and send it in a sealed envelope for testing to the laboratory. Stool collection technique
. Collection vessels (vessels, jars, etc.) should not be subjected to chemical treatment, but only to boiling. To better preserve the viability of microbes, it is recommended to mix feces with an equal volume of a preservative (30% glycerol solution in saline).
It is performed for typhoid-paratyphoid diseases, sepsis, meningococcal infection or other infections accompanied by fever, throughout the entire febrile period of the disease, but better in the initial period or at the height of the disease (with severe bacteremia). For the study, blood is taken from a vein in the elbow; in small children, blood is taken in smaller quantities from the earlobe, heel, and finger. Blood samples are taken after thorough skin preparation in compliance with aseptic rules, using a disposable sterile syringe. Inoculation of sterile material (blood or other liquids containing microbes in healthy individuals) on nutrient media is also best done at the patient’s bedside, or placed in a sterile container containing substances that prevent blood clotting, 0.3% sodium citrate solution, 0.1% solution sodium oxalate). Typically, 5-10 ml of blood is taken and inoculated into a vial containing 50-100 ml of medium. To do this, use a bottle with a nutrient medium (one for aerobes, the other for anaerobes). Blood culture is carried out on liquid nutrient media - 10% bile broth, 1% sugar broth, two-phase medium, as well as liquid and semi-liquid media for the cultivation of anaerobes at a dilution of 1:10. Vials with a nutrient medium are obtained in the laboratory; blood transfusion from a syringe into a vial must be done over the flame of an alcohol lamp, after removing the needle. The vial with the inoculation is sent to the laboratory, and in the evening and at night it is placed in a thermostat. It is important for the student to remember that the earlier from the onset of the disease the culture is performed. The greater the chance of getting a positive result. And, conversely, the later the blood is taken, the smaller the amount of pathogen in it and the less often positive results are obtained. And at normal temperatures - very rarely. You should know that to increase the number of positive results of blood culture, it is recommended, in the absence of contraindications, to inject subcutaneously 1 ml of a 0.1% solution of adrenaline 15-20 minutes before drawing blood, which promotes contraction of the spleen and the release of pathogens into the bloodstream (for example, with typhoid fever). paratyphoid diseases) The preliminary result of culture for typhoid-paratyphoid diseases is obtained after 2-3 days, and the final result - after 7-10 days. It should be remembered that increasing the frequency of blood cultures (three days in a row with a rise in temperature) significantly increases the frequency of microbial isolation from the blood. In treated patients, blood for culture should be taken 5-6 times.
Lumbar puncture
conducted by a doctor.
The nurse carries out: - preparing instruments; — preparing the patient; — assistance to the doctor during manipulation; — ensuring proper care for the patient after the puncture.
The purpose of a lumbar puncture is therapeutic and diagnostic.
Equipment. Sterile cotton balls, tweezers, 3% alcohol solution of iodine (iodinol), syringe 2.0 ml or 5.0 ml, two needles, 0.5% novocaine solution, spinal puncture needle with mandrin, sterile test tubes, alcohol, sterile wipes , adhesive plaster, sterile rubber gloves, referral forms to the clinical and bacteriological laboratory.
1. Place the patient in a sitting position, bending forward, or lying on his side with his knees brought to the stomach.
2. Disinfect your hands and wear sterile rubber gloves.
3. Treat the puncture site (the point between the fourth and fifth lumbar vertebrae) and the surrounding area with an alcohol solution of iodine (iodinol).
4. Anesthetize the skin with novocaine.
5. Perform a lumbar puncture: insert a needle with a mandrin into the point between the spinous processes of the fourth and fifth lumbar vertebrae.
6. Remove the mandrin (liquid should flow out of the needle in a stream or drop) and substitute a sterile test tube. Collect the required amount of liquid for testing.
7. Insert the mandrel into the needle and carefully remove the needle.
8. Treat the puncture site and apply a sterile bandage.
Note: - the patient is transported to the ward in a horizontal position, lying on his stomach, on a gurney; - for the first 2-3 hours the patient should lie on his stomach without a pillow; - Strict bed rest is required during the day.
1.8. Taking blood samples for blood culture studies
In common parlance, sepsis is known as blood poisoning. Less well known is that the mortality rate (mortality rate) due to sepsis is approximately 50%.
Characteristic symptoms:
- apathy/weakness,
- high fever, shaking chills,
- confusion, heavy and rapid breathing,
- rapid pulse, low blood pressure,
- cold hands and feet due to poor circulation (centralization of blood circulation)
Sepsis is an emergency that requires urgent diagnosis and immediate treatment: international recommendations and German treatment guidelines require the administration of antibiotics within one hour. Before administering antibiotics, at least two blood cultures should be taken.
Drawing blood is recommended at the time of a fever attack. One of the peripheral veins is recommended as a puncture site for blood collection.
Organized access to a vein (for example, a central venous catheter) is not suitable for blood collection.
The reliability of the reading is greatly influenced by the prevention of bacterial contamination, the duration of delivery and storage conditions of the sample, and the communication of clinical information.
The following information is required to be provided to the laboratory:
- name of the department,
- date of blood draw,
- patient data,
- presumptive diagnosis,
— if necessary, information about antibiotic therapy.
1.8.1. Hygienic requirements
False-positive blood cultures are typically attributed to poor hygiene practices, resulting in longer hospital stays, unnecessary antimicrobial therapy, additional diagnostic testing, and significant additional costs.
Blood collection using blood culture bottles should be performed taking into account hygienic requirements.
The following steps are required to prevent bacterial contamination:
- Hygienic hand disinfection.
- Use of gloves.
- Disinfection of the puncture site (for example, using 70% isopropanol or skin disinfectant).
- a) applying the disinfectant and distributing it by wiping;
- b) reapply the disinfectant and dry for 60 seconds.
- Disinfection of blood culture bottles:
- a) removing the protective caps;
- b) disinfection of the rubber partition.
Attention! After disinfection of the skin, do not palpate the puncture site again.
1.8.2. Blood collection procedure
1. Follow the above hygiene steps.
Connect the blood culture bottle adapter to the Multifly safety needle holder.
Puncture the vein and secure the needle.
2. Connect the blood culture bottle in a strictly vertical position to the holder.
Do not allow the blood culture vial culture medium to come into contact with the vial seal.
Thanks to the vacuum present in the bottle, it fills automatically.
Attention! Monitor the filling volume.
3. If you intend to perform new blood collections using the S-Monovette, remove the blood culture adapter from the Multifly safety needle holder.
4. In the future, you can take blood in the usual way using the safe Multifly needle.
Attention!
— The manufacturer's recommendations for blood culture bottles must be taken into account.
— After drawing blood, the contents should be mixed thoroughly.
— Do not aerate the bottles; this is not required.
— Send vials with inoculated cultures as quickly as possible at room temperature to the laboratory.
General conditions for storing biosamples before delivery to the laboratory
| Type of product used to collect and deliver the biospecimen | Temperature conditions, etc. | Delivery to the laboratory |
| Bioassays in vitro with transport media | at room temperature (18-20°C), in a dark place | within 48 hours |
| Sterile container with native biomaterial | at room temperature (18-20°C), in a dark place | within 2 hours |
| at a temperature of 2-80C | in 24 hours | |
| at a temperature of 370C | within 2 hours* | |
| Blood vials for sterility | at room temperature (18-20°C), in a dark place | within 2 hours |
| in 24 hours** |
* Delivery of cerebrospinal fluid for bacteriological research.
** Delayed loading of vials into the analyzer increases analysis time.